
DIY Succulent Planters
February 3, 2016
Even though its winter and keeping a plant alive outside is nearly impossible, there are different ways to have a “green thumb” during the cold first months of the year. Succulents are plants that retain water in dry climate and soil, making them perfect to have during the winter. Once a person has gotten their succulent of choice, they might want to transfer it to a cute yet easy-to-make planter. The following planters are not only beautiful, but each can give a room a unique look while adding something of your aesthetic.
Rope-Wrapped Planter
Materials: cord, glue gun, paint, pot, aquarium rocks, and soil
Directions:
- Use your paint to color the top band of the pot (make sure you paint the rim also) and let it dry.
- Wrap the cord around the pot, making sure you glue it to the pot while you are wrapping it, until it reaches the top band.
- Plant your succulent with soil and cover the top layer with the pop of aquarium colored rocks.
Doily Painted Pots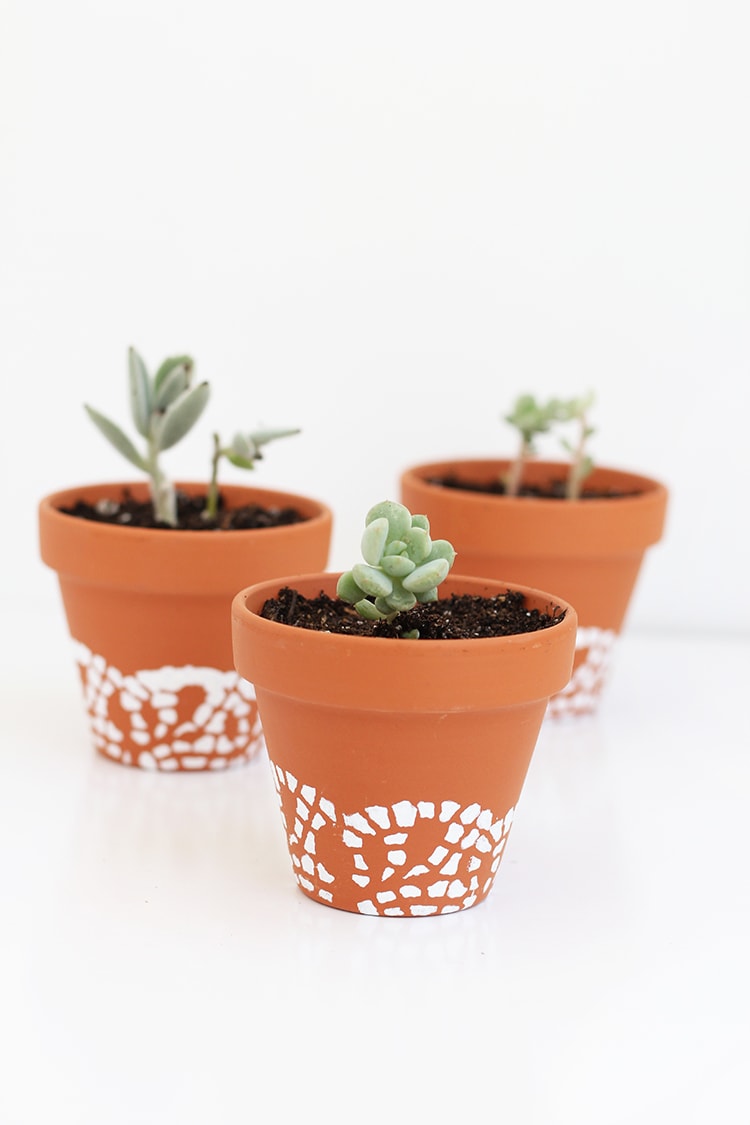
Materials: paper doilies, pot, scissors, foam/ sponge brush, white patio paint or outdoor paint, and soil
Directions:
- Cut your paper doily in a triangles (like cutting a pizza) and place it over your pot.
- Use your sponge brush to dab over the doily with your white paint to create the shapes, and let dry
- Place your soil in the pot and transfer a succulent into it.
Ombré Colored Planter
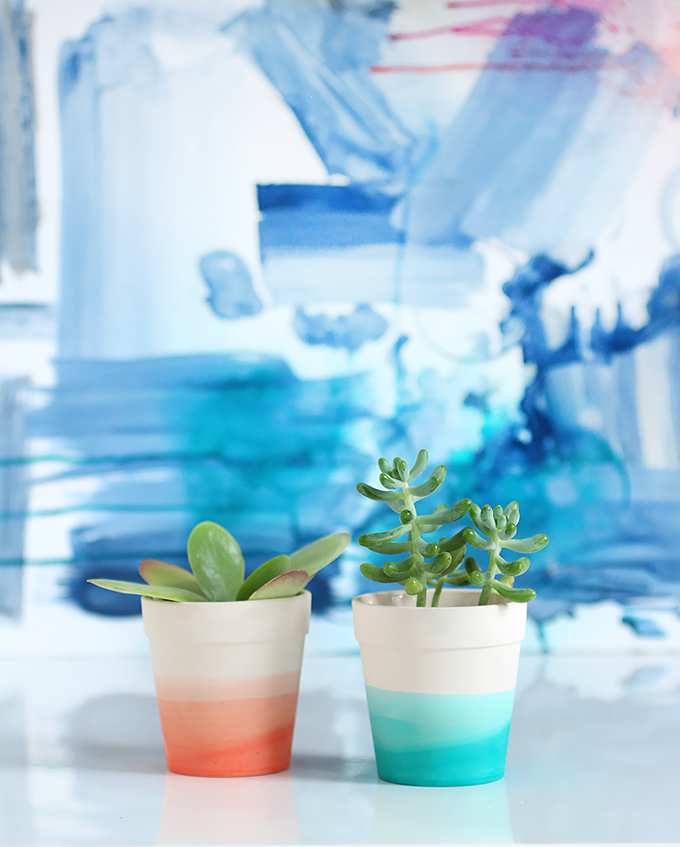 Materials: pot, liquid dyes, and a bowl of warm water
Directions:
- Put your liquid dye in a bowl of water and mix until desired color.
- Dip your pot in the bowl of warm water and then dip it in the bowl of liquid dye for about 90 seconds and leave to dry.
- Once dry, dip pot in liquid dye again about inch lower (to create the ombré effect) for about 30 seconds and leave the pot to dry for an hour.
Fabric Covered Pot
 Materials: Mod Podge, fabric of your choice, scissors, pot, and a brush
Directions:
- Cover your pot with Mod Podge, using your brush.
- Wrap your fabric around the pot, making sure you leave no air bubbles, and cut off excess fabric.
- Using the Mod Podge once again, secure the edges of the fabric to the bottom or the interior of the pot.
Plastic Cup Planter
 Materials: pom pom trim, hot glue gun, 18oz plastic cup, bright spray paint, and little pebbles.
Directions:
- Spray paint your plastic cup.
- Hot glue your pom pom trim to the rim of your plastic cup.
- Place your soil, succulent, and cover the top layer of the soil with the little pebbles.
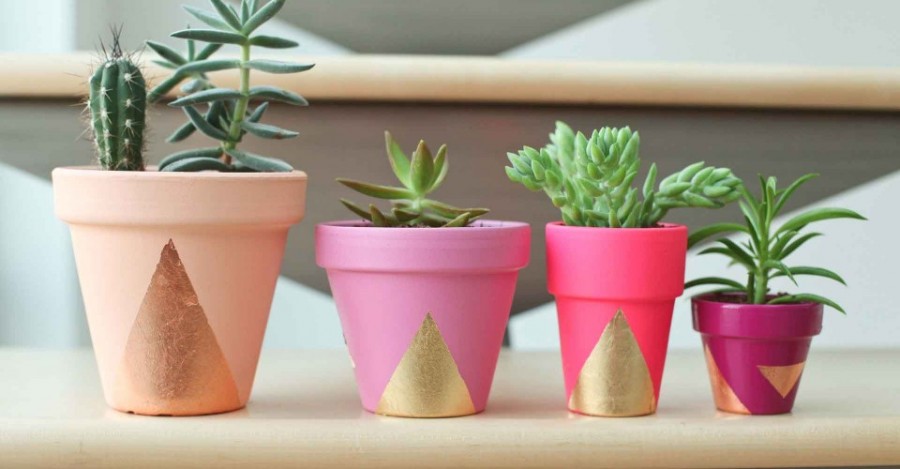
Stenciled Designed Pot
 Materials: wooden paper cups, adhesive stencil film, multiface arcylic paint, and scissors
Directions:
- Cut out your preferred shape or design on the stencil film and stick it on your pot.
- Dab paint on your stencil and peel it off.
- Transfer your succulent into your pot.
Painted Planter
 Materials: arcylic paint, pot, brush, eraser, and Mod Podge
Directions:
- Apply paint to the base of the pot and let dry.
- Using the eraser from a pencil, create patterns of your choice on the pot.
- When completely dry, seal the pot with Mod Podge to give it the finished look.